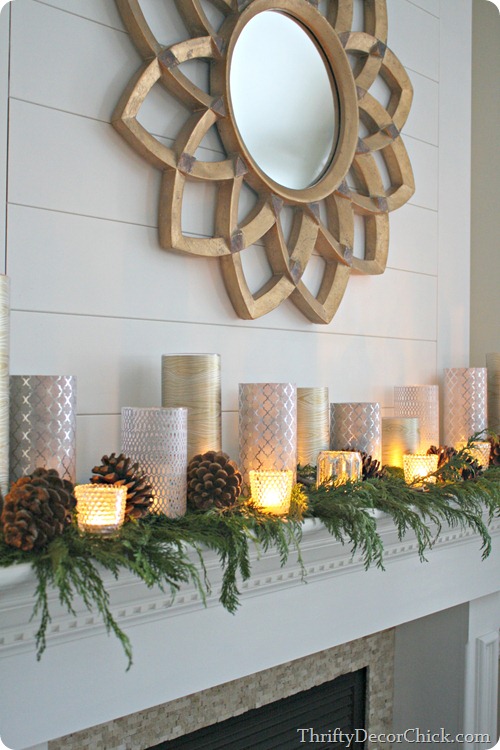
Christmas Tour 2013


Christmas Tour 2013! Ok, it's a bit late. The computer flub right before Christmas kinda set me back a bit. I'm so thankful that the computer is back up and running after just letting it dry out!

Even so, I figured I should share some of the little Christmas-y touches around our house. The upstairs and the kitchen were excluded this year because of all the de-wallpapering and moving rooms around. So really this "tour" is just the living room with a few little touches in the office. I'm hoping next year sees us more settled so I can decorate more!


I may be linking up to some of these link parties here.

Happy Holiday Season!

Happy 2nd day after Christmas!


{Your house still looks like this too, right?}

I hope everyone had a wonderful holiday...


Filled with wonder...


 And crazy lights.


Minimal grinch sightings,


good food,


new memories,


And family.

Wishing everyone blessings and joy as we remember our Savior's birth from Christmas, through the holiday season, and throughout the new year!

On Turning Shirts Into Pillows

I bought a shirt for Hubby at the thrift store that didn't fit. I shouldn't have been surprised since it sported the very vague size Large tag. I should know by now that I have to buy size specific shirts for him with his long arms and broad shoulders. This particular shirt hit his wrists about 3 inches higher than it was supposed to.

Unfortunately, it was one of his very favorite colors and prints.

I guess he could have rolled up the sleeves, but I figured that would get old after a while. And so I got the idea into my head that it would become Christmas pillows. I did not get permission before I did this. Note to self: do that next time.

By the time Hubby found me, I had already started cutting.

Sorry, Love.

But the material was sooo perfect.

how to turn a shirt into a pillow

The front of the shirt was about 18" across from armhole to armhole so the finished pillow cover would fit a 16" insert. Since I planned on using the placket as the opening, I just measured a 17" square(to make room for seam allowances), making sure the buttons were centered in the square, and then cut it out. And because of the stripes, it was totally easy to get straight lines. I lined my scissors up with a line and cut.

I made sure I got the front pocket too.

how to turn a shirt into a pillow

I then pinned it all around, making sure the pocket was far enough away from where the side seam would be, centering the placket the best I could, and lining up the pattern. Then I sewed a 1/2" seam all the way around, clipped the corners, unbuttoned it, turned it inside out, and stuffed it with a pillow insert. My insert ended up being 18" to my cover's 16" so it's a very full pillow but I don't mind.

how to turn a shirt into a pillow

how to turn a shirt into a pillow

I did not pay attention to the back seam that goes across the shoulders when I cut it. It wouldn't lay right until I put in the insert. Now it looks fine but if I was doing it again I'd probably cut out the front first, then lay that piece further down on the back, lining up the pattern and then cutting out the back piece.

how to turn a shirt into a pillow

how to turn a shirt into a pillow

But it's all good.

And I think Hubby likes them after all.

Merry Christmas everybody!


My Bad Computer Decision

So...bad news, guys. I did a dumb and left a full cup of water by my computer. One day after my mom warned me against it. Yup. 

I'm working on drying it out and seeing if it's dead or not. I'll try to get out another post soon but I'll have to find another computer to use. We shall see.

This might just hurry up our plans to get a new computer. Good thing we had that plan in place. Too bad we may have to implement it sooner.

So we'll see how it goes over the next few days!

Hope everyone has a great weekend! 


DIY Furry Christmas Tree Skirt


I did it. I made a tree skirt. It didn't turn out quite like I expected. Actually, I didn't set out to make a tree skirt at all. It...happened.

All because Jo-Ann Fabric didn't have what I wanted.

I originally wanted to make a few faux sheepskin rugs to lay under the tree. I figured I could use them throughout the year anywhere that needed a little sheepskin love. Which if you remember this post, is EVERYWHERE!


Well, when I got to Jo-Ann's, they had white grizzly bear fur and this stuff. The bear fur was pretty and I liked the fur length, but no matter how I looked at it, it definitely still looked like a bear. Or a wolf. Which is great but wasn't what I wanted. So I went with the shorter and cheaper fur.

I had no idea when I went in, but all the fake fur was on sale 40% or 50% off. I can't remember which. I just know I was a happy camper when I saw how much I saved.

I followed this tutorial for cutting out the tree skirt shape. Basically, fold your material in fourths, inside out. Hold one end of your measuring tape at the corner and swing the other end from one side to the other, marking a semi-circle with your fabric chalk or marker for the width, and then a smaller semi-circle for the tree hole. Unfold it and cut one line all the way up to the small hole so you can wrap it around your tree.

I made the semi-circle 27" from the corner and the semi-circle for the tree opening 3.5". I used a yard and a half of material and 27" was as big as I could get it. You could get two yards of fabric if you wanted a wider skirt.


I'd try to give you better directions, but I couldn't take many pictures as Little Man kept trying to shuffle across the material on the floor. And he does not distract well. I know he gets that one-track mind from somewhere...

A quick warning: this stuff sheds. I bought this stuff wearing a black wool coat and I was covered with white fluff before I even left the store. It was worse at home. Anyone beside me watch British dramas? Those cotton factory scenes in North and South? White fluff floating everywhere?

Imagine me in those scenes. Except in my maternity yoga pants and Hubby's large t-shirt. And way worse lighting.


To stop the shedding madness, I sewed a zig-zag type stitch around the very edge. As I went, I pulled the fur back from the edge, hoping that the fur would be long enough to cover the stitch when was I was done.

It wasn't.

I tried turning the edge under to make a small hem but I only sewed about four inches when I realized that it looked a whole lot sillier that way. So I called it a day, ripped out that stitch, and deemed this project done.


When I put it under the tree, I casually fold it under a bit to hide the edge. Even so, the edge really isn't that noticeable. The fur kinda falls over it in some places and when you're walking around you're not looking at it anyway.

Way easier than I expected it would be. And now we have our first Christmas tree skirt! I love it. Even if I hadn't originally planned it. And so much furry texture!

I have most of my Christmas decorations up now. I started late so I still have a few more things to make. How about you?


My $15 Christmas Mantel

Yay! Yesterday was a sunny picture taking day that was perfect for snapping photos of the Christmas mantel! It's the dark side of the room so even on sunny days it can be a challenge to photograph. Which is great, because I think it might be the best Christmas mantel I've done yet. Out of the two I've done.

Anyways, on to actual pics! Or at least the few I got before my camera battery died...

My $15 Christmas Mantel

This year I decided to go with an elegant, rustic, modern, green and white theme with touches of red. Partly because I already had a couple Christmas pillows and I wanted to work with them to save money. And I am loving my Christmas pillows this year! But that's another post for next week.

I shopped my house like a boss to get this mantel. I bought the mirror rather recently at the thrift store for $5 knowing that, whether Christmas or not, it was going over the fireplace. Since we were currently painting the new nursery and all the brushes were out and covered in paint, I taped the mirror off and gave it 3 new coats of white paint. I should have sanded it first because the previous paint job was gloppy, but I was in a hurry. Just don't look real close, mmmk?

My $15 Christmas Mantel

The wreath is the one purchase specifically for the mantel. I found it at Ikea for about $10. I love how wreaths look hanging on mirrors so I knew I had to go for it with the new mirror! Just a strip of burlap garland and some thumbtacks in the wall to hold it. Definitely needed Hubby's help for that one.

My $15 Christmas Mantel

Everything else is stuff I already had floating around. A few old green bottles, with a few berries left over from making the wreath for the front door brings in color, while all the white candles keep it light.

He he he...light.

Aren't I punny?

My $15 Christmas Mantel

I'm still in love with the chalkboard. I reused it from my fall mantel. Maybe my chalk art skills are improving? Ummm, not yet.

I really love how it turned out! And I'm dying to light all those candles at once! I bet they'll look amazing. I love candles but I always forget to light them. Doesn't help that every candle I have has to be up high before I can light it with Little Man running around.


And being cute and stuff.

Please tell me I'm not the only mom with only blurry pictures of her kid because he won't be still for two seconds? 

So, the mantel looks great! When you count the mirror, I only spent $15 with the wreath. Since Christmas is usually a budget buster time, it's really great to try and reinvent things you already have for decorations. I had to gather every white candle I had and move some stuff out of their place in other rooms to put it all together. It's a skill I'm working on.

I love having a mantel!

Do you shop your house? Do you have a mantel or mantel type thing that you decorate?


I may be linking up to a few of these link parties.

Christmas Mantel Round-up!

Christmas mantel time! I've been working on mine for the past couple days and I think I may have decided on a final design. I will be sharing it later this week so keep an eye out! I think we're supposed to get one sunny day here soon so I've been working on different Christmas projects so when that day gets here I can just whip out the camera and take all the pictures. Sunny days are few and far between around here at the moment.

So, in lieu of sharing mine, today I'm sharing a few of my favorite mantels that I've seen this year. They are all so gorgeous! 


Snowdrift Mantle Style by Hank + Hunt | west elm


Elegant Christmas mantel


Woodsy Glam Christmas Mantel  MyBlessedLife.net


Christmas Mantel


All the gorgeousness! 

Have you decorated your mantel yet? Or do you even decorate your mantel? Or do you decorate it for another holiday besides Christmas? I've never seen a Hanukkah mantel but then I've never looked either. I'd love to see one!


ps. After talking with Hubby, I have decided to cut back to posting for sure only on Tuesdays and Thursdays. He's been asking me to consider cutting back to twice a week for a couple months now, and with the holidays and a new baby almost here{here's to the third trimester!}, we just think it will work better for us. I love sharing with you all and I hope you will still stop by every now and then!

Monogram Winter Wreath

Another late post! I am losing my groove, y'all. Little Man's sleeping schedule is suddenly not very scheduled so I'm working on finding another way to blog that works in our "not schedule." In the past I always worked on projects and blogged while he was napping or after he went to bed at night. Lately, there have been many days of no naps and all the other days are short{30-40 minute} naps. Just enough time to sort a load of laundry and stick it in the machine.

Not even time to make and enjoy a cup of coffee. Oh, the inhumanity!

Since it is the busy Christmas season and since I'm working on figuring out a new project/blogging schedule, I'm not sure how often I'll be able to post in a week. I'll still aim for new posts on Monday, Wednesday, and Friday, but I may miss some. I do want to share as much as I can!

Anyway, to my latest Christmas project.


So guess what I spent all last night doing? Beside painting a few things in the future nursery? I put together my winter wreath for this year! Sort of. I went to bed at midnight rather flustered because I couldn't figure out the whole burlap bow hanger thing.

Google was no help to me. At least not when every direction I found sounded like gibberish because I was so tired. I'm pretty sure my way is not the best way to hang a wreath, but it is hanging. That's the important part, right?

I ended up cutting a length of burlap in half lengthwise to make a skinnier ribbon. I stink at tying bows anyway and I found it impossible with the wide burlap I was using. So altogether there are two pieces of burlap in the hanger: one that's looped around the wreath, and a second one that's tied into a bow and attached to the burlap loop with jute twine. I attached another small loop of jute twine to the burlap loop to slip over the nail to hang it.

Basically, I rigged it.


Again, it's hanging. I'm happy.

I found the wreath form at the thrift store, the wooden letter at Hobby Lobby, and all the floral stuff was free from my Nana. I just snipped all the flowery stuff that I wanted with wire cutters, laid out the pattern I wanted, and then hot glued it all down.


The wooden letter got a few coats of white spray paint. To make a hanger I hot glued a metal tab off a coke can to the back. I tied it on to the burlap hanging loop with more jute twine.


Here's the after shot of what I used. After I cut everything up. 'Cause that's how I roll.

Not to be a little black rain cloud here, but if you think this sounds easy, it wasn't. Well, not quite true. It was actually more frustrating than difficult. I'm pretty sure a few not so great things wanted to leave my mouth during the process. I've decided that I'm not becoming a florist any time soon.


And there you have it. My Christmas/winter wreath. I'm actually quite happy with it. Especially since it was my first go at a wreath. I'm wearing my hot glue burns with pride today.

Are you making, or have already made, a wreath this year?


I may be linking up here.

Bring on the Season!

Hello friends! It's been a few days since posting and I just wanted to drop in and say hi! I hope everyone had a great Thanksgiving with friends and family. We had a very crazy fun time with the In-Laws and some good friends over the holiday. I even got some Black Friday shopping in!

I'm back home now and ready to get on this whole Christmas train. Hopefully we'll be able to get our tree up this week! There's something about a Christmas tree that puts me in the Christmas spirit. That and Christmas music, which is now totally acceptable to listen to since Thanksgiving is over!

I'm looking forward to sharing some of our Christmas planning with you all. Coming soon! As soon as I get rid of the turkey/travel coma.